

With the rise of digital tools and technology, artists now have the opportunity to take their traditional hand-drawn sketches and transform them into vibrant digital art. This process opens up endless possibilities for creativity, as it allows for greater flexibility in modifying, enhancing, and experimenting with the artwork. Whether you’re a beginner or a seasoned artist, understanding how to effectively digitize your sketches can help elevate your work to a whole new level. Here’s a step-by-step guide on how to transform your sketches into stunning digital art.
1. Start with a Clear and Clean Sketch
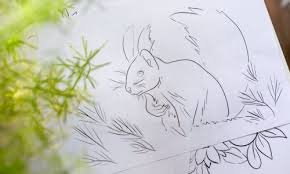
The foundation of successful digital art starts with a good traditional sketch. It’s essential that your hand-drawn sketch is clean and clearly defined. Use a pencil or pen to draw your sketch, ensuring that the lines are crisp and easily distinguishable. Avoid unnecessary smudges or shading that could complicate the digitization process later.
When sketching, it’s a good idea to keep the outlines simple and avoid overcomplicating the details. The more straightforward your sketch is, the easier it will be to work with digitally. If you’re using a pencil, make sure to erase any extra marks once you’re finished.
2. Scan or Photograph Your Sketch
Once your sketch is ready, you need to get it into digital form. There are two main methods for capturing your artwork: scanning or photographing.
- Scanning: If you have access to a scanner, this is the ideal method. Scanning produces a high-resolution image with accurate colors and details. Set your scanner to a high DPI (dots per inch) to ensure a sharp and clear digital version of your sketch.
- Photographing: If you don’t have a scanner, a good quality camera or smartphone can do the job. Make sure the lighting is bright and even to avoid shadows or reflections on the paper. Take the photo straight on to avoid distortion, and ensure the entire sketch is captured.
Once scanned or photographed, upload the image to your computer, ready for editing.
3. Clean Up the Image Using Editing Software
The next step is to clean up your scanned or photographed sketch using digital editing software. Programs like Adobe Photoshop, GIMP, or Procreate are popular choices for artists. Here’s what to do:
- Remove the background: If your paper has any texture or unwanted marks, use the software’s selection tools to remove the background or make it white. This will give your sketch a clean, professional look.
- Adjust brightness and contrast: Increase the contrast to make the lines of your sketch stand out more clearly. Adjust the brightness to get rid of any gray areas or imperfections.
- Refine the lines: Use the brush or pen tool to trace over your sketch, making the lines sharper and more defined. You can also adjust the thickness of your lines or change the color to better suit the digital format.
These cleaning steps help ensure that the original sketch translates well into the digital space without distractions or imperfections.
4. Add Color and Texture
One of the advantages of digital art is the ability to add vibrant colors and textures that weren’t possible with traditional sketching. Once your lines are cleaned up, you can start adding color to bring your artwork to life.
- Flat color: Use the paint bucket tool or the brush tool to fill in areas of your sketch with flat colors. You can experiment with different color palettes to find the ones that best suit the mood or theme of your art.
- Shading and highlights: To add depth and dimension, use layers to create shading and highlights. Digital art software allows you to work with different blending modes and opacities to make your colors look more natural and dynamic.
- Textures and effects: You can also incorporate textures or patterns into your digital art to mimic traditional mediums, such as watercolor or pencil. Some software comes with pre-installed brushes for specific textures, or you can download custom brushes from online communities.
Taking the time to add color and texture will give your digital art richness and depth, making it visually appealing and polished.
5. Experiment with Layers and Effects
Digital art offers the flexibility to work in layers, allowing you to manipulate different elements of the artwork without affecting the entire composition. Use multiple layers to separate the line art, colors, shading, and background. This way, if you make a mistake or want to make changes later, you can easily adjust one layer without disturbing the rest of the image.
Additionally, take advantage of the various effects offered by digital art software. You can apply filters, adjust lighting, add gradients, or even simulate textures like paper or canvas. These effects can help enhance the mood of your piece and add visual interest.
6. Final Touches and Exporting the Image
Once you’re happy with the coloring, shading, and effects, it’s time to finalize your digital artwork. Review your sketch for any small details that may need refining, such as cleaning up stray lines or adjusting color tones.
After making final adjustments, it’s time to export the image. Depending on what you plan to do with your artwork, export it in the appropriate file format. Common formats for digital art include PNG (for high-quality images with transparent backgrounds), JPEG (for standard image files), or TIFF (for high-resolution artwork).
If you intend to print your digital artwork, make sure to save it at a high resolution (300 DPI is ideal for print). For web use, a lower resolution (72 DPI) may suffice.
Conclusion
Transforming sketches into digital art is an exciting way to expand your creative potential. With the right tools and techniques, you can elevate your hand-drawn sketches into polished, vibrant pieces of digital artwork. By following these steps—scanning or photographing your sketches, cleaning them up, adding color and texture, and experimenting with layers—you can create digital art that reflects your unique artistic style. With practice, you’ll be able to seamlessly blend traditional sketching with the limitless possibilities of digital tools.